Connecting to Databricks via ODBC
Guide to establishing a connecting with a Databricks cluster via ODBC in the Secure Data Environment (SDE).
This guide explains how to connect to a Databricks cluster using ODBC with R and Stata in the Secure Data Environment (SDE). It also shows how to create a Databricks Personal Access Token (PAT) and use it to log in.
You only need ODBC if you plan to use RStudio Desktop or Stata. Most work can be done directly in Databricks, using PySpark or Spark SQL, which are optimised for big data.
Unlike Spark’s native distributed processes, ODBC relies on a single connection to transfer data, effectively serialising large dataset transfers. This means advanced Spark features (for example, parallel write or distributed computing) aren’t fully leveraged, and data operations are often significantly slower and limited in scale.
Your Virtual Desktop Instance (VDI) typically has far less RAM and CPU resources than a Databricks cluster, which limits how much data you can retrieve or process locally. Large queries may exceed VDI memory constraints, resulting in slow performance or potential out of memory errors.
To use an ODBC connection, your cluster must be running. Learn how to check this.
Generating a Databricks Personal Access Token (PAT)
You will need a PAT token for authentication. Once set up, you do not need to repeat this process every time you log in.
If you already have tokens saved in the SDE for other purposes, you will still need to follow these steps. Existing tokens cannot be reused for different connections.
In Databricks
Open Databricks on your desktop, then enter your login credentials.

Before you continue, make sure that there is a cluster running under Compute. This is not necessary to create a PAT, but it will be needed to create the ODBC connection, and clusters may take a while to start. Learn how to check that a cluster us running.
Generating a new token
To generate new tokens:
1. Select your user profile or username (usually in the top right corner).
2. Select Settings from the dropdown menu.
3. Select the Developer settings.
4. Select Manage Access tokens.
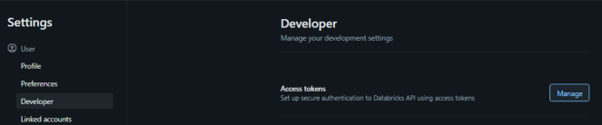
To generate a new token:
5. Select Generate new token. You can add an optional comment, for example, ODBC connection, and set an expiration date. The only API scope you should select for this is sql.
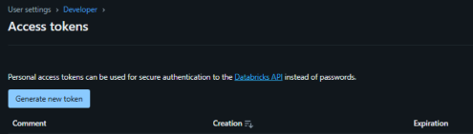
6. Copy the token immediately, because you will not be able to view it again. You will need to save to a text file for future use.

Storing your personal token
You will need to store the personal token in your home folder on the VDI Desktop. We recommend storing in a text file, for example, db_tokens.txt.
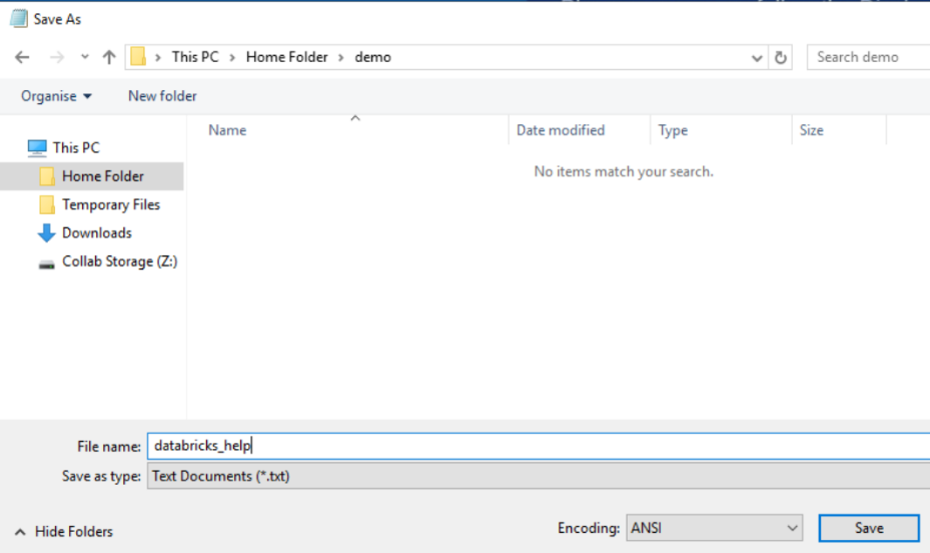
Best practice
- do not share the token with anyone else, for example, storing in the Collab folder
- do not hard code the token in R/Stata scripts or version control
- generate tokens with shorter expiration periods if possible. If a token is compromised or no longer needed, revoke it immediately in your Databricks user settings
- you may want to make a note of the expiry date in the text file
Configuring the ODBC Driver
Once you have your token stored inside a text file, you are ready to set up your connection to Databricks.
The ODBC driver is already installed and pre-configured to work with your databricks cluster: it is assigned under the data source name (DSN) Databricks.
You only need to update it with your PAT token to establish a successful connection.
Open ODBC data source administrator and locate the Databricks DSN
1. Search for ODBC in your address bar Search box.
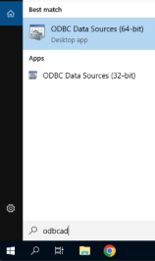
2. Select the 64-bit option.
3. Go to the User DSN tab.
4. Select the Databricks DSN name and click Configure.
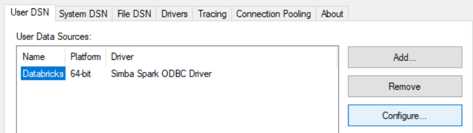
5. In the configuration window, locate the authentication settings.
6. Copy your PAT token from your text file (or straight from Databricks). If a token has special characters in, double clicking may not select all of it, you may need to highlight it manually.
7. Paste your PAT token into the Password field.
8. Test the connection: click Test to verify that everything is correct.
9. If successful, click ok to save.
If unsuccessful, try the following:
- ensure that you have copied the PAT correctly
- try creating a new Databricks PAT and using that one instead, just in case there is an error with the other one
- check that the Databricks cluster hasn’t terminated, that can also cause issues learn how to check that a cluster is running
You will need to establish a new ODBC connection each time you use the VDI, but you should not need a new token until it expires.
Reading the data
Connecting to Databricks via ODBC in RStudio Desktop
1. Install required packages (If not installed).
install.packages(c("DBI", "odbc"))
2. Load the packages
library(DBI)
library(odbc)
3. Establish the connection
databricks_conn <- dbConnect(odbc(), "Databricks")
4. Test the connection
We can list all the available tables to verify a successful connection:
databases <- dbGetQuery(
conn = databricks_conn,
statement = "SHOW DATABASES"
)
all_tables <- lapply(databases$databaseName, function(x) {
tbls <- dbGetQuery(
conn = databricks_conn,
statement = paste0("SHOW TABLES IN ", x)
)
tbls$tablePath <- paste(
tbls$database, tbls$tableName, sep= "."
)
return(tbls)
})
all_tables <- do.call(rbind, all_tables)
head(all_tables)
5. Execute queries
To return data you can run SQL queries using dbGetQuery() function from the DBI packages:
query_df <- dbGetQuery(
conn = databricks_conn,
statement = "SELECT * FROM
reference_data.dss_corporate.calendar LIMIT 10")
6. Close the connection
Once you have finished querying your data, you can close the connection using:
dbDisconnect(databricks_conn)
Connecting to Databricks via ODBC in Stata
This process is only applicable to users who have an active Stata license.
More information is available on the ODBC Stata package
1. Open Stata
Launch Stata on your machine.
2. Verify the Databricks ODBC data source
You can list all defined data source names (DSNs) to which Stata can connect and verify the “Databricks” ODBC data source is present:
odbc list
3. List all available table names
odbc query "Databricks"
4. Describe a table from the “Databricks” ODBC source
odbc describe "calendar", dsn("Databricks")
5. Load a table into memory using an SQL query
odbc load, exec("SELECT * FROM
reference_data.dss_corporate.calendar
LIMIT 10") dsn("Databricks") clear
Last edited: 17 August 2026 11:10 am